Operating a Video Endoscopy System: A Comprehensive Guide
As a trusted supplier of Video Endoscopy Systems, I understand the importance of providing clear and detailed guidance on how to operate these sophisticated medical devices. In this blog post, I will walk you through the step-by-step process of operating a Video Endoscopy System, from setup to maintenance.
Step 1: Pre-Operational Setup
Before using the Video Endoscopy System, it is crucial to ensure that all components are properly connected and functioning. Here’s a checklist to follow:
- Inspect the Equipment: Carefully examine the endoscope, camera, light source, and monitor for any visible damage or defects. Check the cables and connectors for proper attachment and integrity.
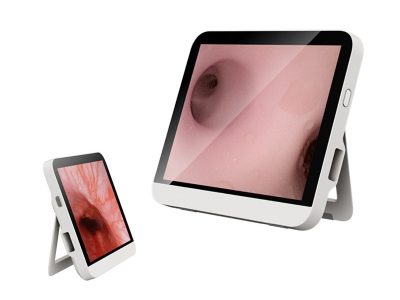
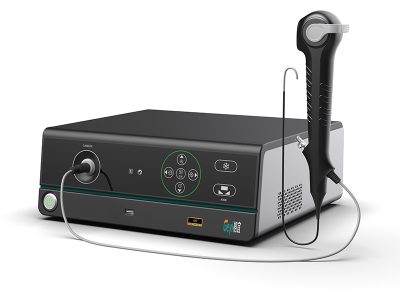
- Connect the Components: Connect the endoscope to the camera control unit, the light source to the endoscope, and the monitor to the camera control unit. Make sure all connections are secure and tight.
- Power On the System: Turn on the light source, camera control unit, and monitor in the specified order. Allow the system to warm up for a few minutes before proceeding.
- Calibrate the Camera: Follow the manufacturer’s instructions to calibrate the camera for optimal image quality. This may involve adjusting the white balance, contrast, and brightness settings.
- Check the Image: Once the camera is calibrated, insert the endoscope into a test object or simulator to verify that the image is clear and sharp. Make any necessary adjustments to the settings if the image appears distorted or blurry.
Step 2: Patient Preparation
Before inserting the endoscope into the patient, it is important to prepare the patient and the examination area. Here’s what you need to do:
- Explain the Procedure: Inform the patient about the purpose of the endoscopy, the procedure itself, and any potential risks or discomfort. Answer any questions the patient may have to alleviate their anxiety.
- Obtain Informed Consent: Obtain written informed consent from the patient or their legal representative before proceeding with the procedure.
- Administer Anesthesia: Depending on the type of endoscopy and the patient’s condition, local or general anesthesia may be administered to minimize discomfort.
- Position the Patient: Position the patient in the appropriate position for the examination, such as lying on their back or side. Use pillows or cushions to support the patient’s body and ensure their comfort.
- Prepare the Examination Area: Clean and disinfect the examination area to prevent the spread of infection. Place a sterile drape over the patient’s body to maintain a sterile field.
Step 3: Insertion of the Endoscope
Once the patient is prepared, it’s time to insert the endoscope into the body. Here’s how to do it:


- Lubricate the Endoscope: Apply a water-soluble lubricant to the tip of the endoscope to facilitate smooth insertion and reduce friction.
- Insert the Endoscope: Gently insert the endoscope into the appropriate body opening, such as the mouth, nose, or anus. Use a slow and steady motion to avoid causing any discomfort or injury to the patient.
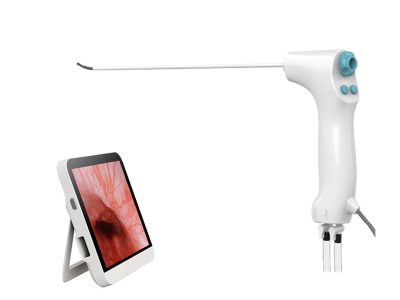
- Advance the Endoscope: As you insert the endoscope, use the control knobs on the endoscope handle to manipulate the tip and navigate through the body’s natural passages. Follow the anatomical landmarks and use the real-time video image on the monitor to guide your movements.
- Monitor the Patient: Continuously monitor the patient’s vital signs, such as heart rate, blood pressure, and oxygen saturation, during the procedure. If the patient experiences any pain or discomfort, stop the procedure immediately and take appropriate measures.
Step 4: Image Capture and Documentation
During the endoscopy, it is important to capture high-quality images and videos of the internal organs and tissues for diagnostic purposes. Here’s how to do it:
- Adjust the Settings: Use the camera control unit to adjust the image settings, such as focus, zoom, and freeze frame, to capture clear and detailed images.
- Capture Images and Videos: Press the appropriate buttons on the endoscope handle or camera control unit to capture still images or record videos of the relevant areas. Make sure to label the images and videos with the patient’s information and the date of the procedure.
- Review the Images and Videos: After the procedure, review the captured images and videos with the patient and the medical team. Discuss the findings and make any necessary treatment recommendations.
Step 5: Removal of the Endoscope
Once the examination is complete, it’s time to remove the endoscope from the body. Here’s how to do it:
- Clean the Endoscope: Before removing the endoscope, clean the tip and the outer surface of the endoscope with a sterile cloth or sponge to remove any debris or secretions.
- Withdraw the Endoscope: Slowly and gently withdraw the endoscope from the body, following the same path as the insertion. Use a slow and steady motion to avoid causing any discomfort or injury to the patient.
- Check the Patient: After removing the endoscope, check the patient’s vital signs and ask them if they are experiencing any pain or discomfort. Provide appropriate post-procedure care and instructions to the patient.
Step 6: Post-Operational Maintenance
After using the Video Endoscopy System, it is important to perform proper maintenance to ensure its longevity and optimal performance. Here’s what you need to do:
- Clean and Disinfect the Equipment: Follow the manufacturer’s instructions to clean and disinfect the endoscope, camera, light source, and other components of the system. Use appropriate cleaning agents and disinfectants to prevent the spread of infection.
- Store the Equipment: Store the cleaned and disinfected equipment in a clean and dry place, away from direct sunlight and heat. Use a protective case or cover to prevent damage to the equipment.
- Perform Regular Maintenance Checks: Schedule regular maintenance checks and inspections of the Video Endoscopy System to ensure its proper functioning. Replace any worn or damaged parts as needed.
- Train the Staff: Provide regular training and education to the staff on the proper use, maintenance, and troubleshooting of the Video Endoscopy System. Encourage them to follow the manufacturer’s instructions and best practices.
Conclusion
Operating a Video Endoscopy System requires proper training, knowledge, and skills. By following the steps outlined in this blog post, you can ensure the safe and effective use of the system for diagnostic and therapeutic purposes. If you have any questions or need further assistance, please do not hesitate to contact us. We are committed to providing high-quality Video Endoscopy Systems and excellent customer service.
If you are interested in learning more about our Laparoscopic Camera System, 4K Laparoscopy System, or Endoscope Image Processor, please feel free to contact us for a detailed product demonstration and pricing information. Our team of experts is ready to assist you with your procurement needs.
References
- American Society for Gastrointestinal Endoscopy. (2021). ASGE Standards of Practice Committee. Quality indicators for upper endoscopy. Gastrointestinal Endoscopy, 93(2), 257-265.
- European Society of Gastrointestinal Endoscopy. (2020). ESGE Quality Improvement Initiative. Quality improvement in gastrointestinal endoscopy: key performance indicators for colonoscopy. Endoscopy, 52(8), 721-730.
- World Health Organization. (2019). Guidelines on hand hygiene in health care: First global patient safety challenge. Geneva: World Health Organization.

 Blog
Blog
 Blog
Blog
 Blog
Blog