Can a portable bronchoscope be used for pre – operative assessments?
Hey there! I’m in the business of supplying Portable Bronchoscopes, and today I wanna chat about whether a…
Read article →

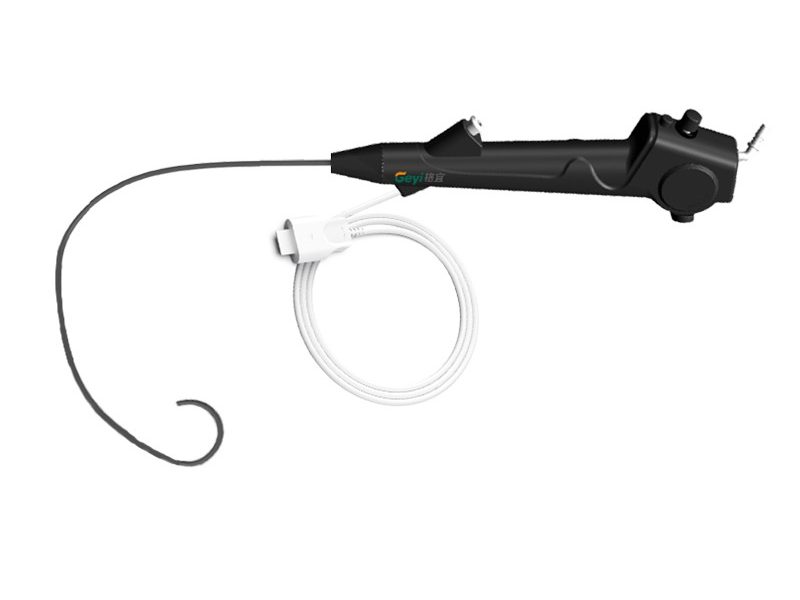
As a dedicated supplier of Disposable Cystoscopes, I understand the critical importance of proper operation in urological procedures. In this blog, I will share detailed insights on how to operate a disposable cystoscope correctly, ensuring both patient safety and the effectiveness of the examination.
Before starting the cystoscopy procedure, thorough preparation is essential. First, gather all the necessary equipment. This includes the Disposable Cystoscope, irrigation fluid, local anesthetic, and appropriate drapes. Ensure that the cystoscope is within its expiration date and has been properly stored to maintain its integrity.
Inspect the cystoscope carefully. Check for any visible damage to the outer sheath, the lens, and the working channels. A damaged cystoscope can lead to inaccurate results and may pose a risk to the patient. Connect the cystoscope to the light source and camera system, if applicable, and test the functionality. Make sure the light is bright and evenly distributed, and the camera provides a clear image.
Prepare the patient. Explain the procedure to the patient in detail, addressing any concerns they may have. Obtain informed consent. Position the patient in the lithotomy position, which provides the best access to the urethra and bladder. Cleanse the perineal area with an antiseptic solution and drape the patient to maintain a sterile field.
Once the patient is prepared, it’s time to insert the cystoscope. Apply a generous amount of a water – soluble lubricant to the tip of the cystoscope. This helps to reduce friction and discomfort during insertion. For male patients, gently retract the foreskin if present and clean the meatus.
Hold the cystoscope like a pen, with your dominant hand, and use your non – dominant hand to gently guide the penis or labia. Slowly insert the cystoscope into the urethral meatus. Advance the cystoscope smoothly, following the natural curve of the urethra. In male patients, there are two distinct curves: the initial downward curve in the bulbous urethra and the upward curve at the prostatic urethra. Be gentle when passing through these curves to avoid trauma.
As the cystoscope is advanced, use the irrigation system to keep the urethral lumen open and clear the view. The irrigation fluid also helps to reduce friction and discomfort for the patient. If resistance is encountered during insertion, do not force the cystoscope. Instead, stop and re – evaluate the situation. It may be necessary to adjust the angle of insertion or use additional lubrication.
Once the cystoscope has reached the bladder, the next step is to examine the bladder thoroughly. First, ensure that the bladder is adequately filled with irrigation fluid. This provides a better view of the bladder mucosa. Use the controls on the cystoscope to adjust the direction of the tip, allowing you to visualize different areas of the bladder.
Start by examining the trigone, which is the most sensitive area of the bladder and is often the site of early pathological changes. Look for any abnormalities such as tumors, ulcers, or inflammation. Then, systematically examine the lateral walls, the dome, and the posterior wall of the bladder. Use the camera system to capture images or record videos of any significant findings.


During the examination, it’s important to maintain a slow and methodical approach. Take your time to ensure that all areas of the bladder are visualized. If necessary, adjust the irrigation rate to optimize the view. Be aware of the patient’s comfort level and communicate with them throughout the procedure.
The Single Use Flexible Cystoscope offers greater flexibility compared to rigid cystoscopes, allowing for more precise manipulation. Use the control knobs to bend the tip of the cystoscope in different directions. This enables you to access difficult – to – reach areas of the bladder, such as the bladder neck and the ureteral orifices.
When examining the ureteral orifices, look for normal peristaltic activity and the appearance of clear urine jets. If you need to perform a retrograde pyelogram, you can insert a catheter through the working channel of the cystoscope and into the ureteral orifice. This allows for the injection of contrast media to visualize the upper urinary tract.
After the examination is complete, it’s time to remove the cystoscope. First, empty the bladder of the irrigation fluid by gently withdrawing the fluid through the cystoscope’s working channel. This helps to reduce the patient’s discomfort after the procedure.
Slowly and smoothly withdraw the cystoscope from the bladder and urethra. As you withdraw, continue to observe the urethral mucosa for any signs of trauma or bleeding. Once the cystoscope is completely removed, clean the perineal area again and provide the patient with a clean gown.
After the cystoscopy procedure, it’s important to provide appropriate post – operation care. Instruct the patient to drink plenty of fluids to help flush out the bladder and prevent urinary tract infections. Advise the patient to expect some mild discomfort, such as burning on urination or blood in the urine, which is normal for the first 24 – 48 hours after the procedure.
Monitor the patient for any signs of complications, such as severe pain, excessive bleeding, or fever. If any of these symptoms occur, the patient should seek medical attention immediately. Provide the patient with a follow – up appointment to discuss the results of the examination and any further treatment options.
Correct operation of the disposable cystoscope is crucial for several reasons. First, it ensures the safety of the patient. A properly performed cystoscopy minimizes the risk of trauma to the urethra and bladder, reducing the likelihood of complications such as bleeding, infection, and stricture formation.
Second, correct operation leads to accurate diagnostic results. By visualizing the bladder and urethra clearly, healthcare providers can detect early signs of disease, such as tumors or inflammation. This allows for timely treatment and better patient outcomes.
Finally, using a disposable cystoscope offers added benefits in terms of infection control. Disposable cystoscopes eliminate the need for reprocessing, reducing the risk of cross – contamination between patients.
Operating a disposable cystoscope correctly is a skill that requires proper training and experience. By following the steps outlined in this blog, healthcare providers can ensure a safe and effective cystoscopy procedure. At our company, we are committed to providing high – quality Disposable Flexible Cystoscopes that meet the highest standards of performance and safety.
If you are interested in purchasing our disposable cystoscopes or have any questions about their operation, please feel free to contact us for a procurement discussion. We look forward to working with you to improve urological care.
 Blog
Blog
 Blog
Blog
 Blog
Blog